SQL Server Pre-Reqs
With prior versions of vCenter one could easily configure their SQL server and ODBC connection to use SSL. This encrypted all communications between vCenter and the SQL server, which is a great best practice. However, in vCenter 5.1 the SSO service uses a JDBC connector, which I have not been able to reliably configure with SSL.
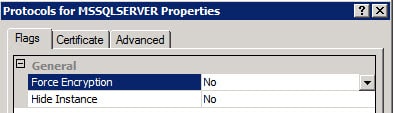
If your SQL server is forcing SQL SSL encryption, then you won’t get past the SSO installer as it will fail. You can validate your SQL server configuration by looking in the SQL Server Configuration Manager on your SQL server and reviewing the properties of the Protocols for MSSQLSERVER. As shown below, if Force Encryption is set to Yes you will need to change it to NO and restart the SQL services.
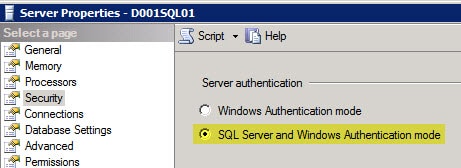
On another security note the SQL server MUST be configured to allow both Windows integrated authentication AND SQL authentication. SQL authentication is very weak, which makes the use of SSL for the database connection that much more imperative. Should the SQL server only allow Windows integrated authentication you will likely get the following error:
Error 29115.Cannot authenticate to DB.
Use SQL studio to login to your SQL server, open the server properties then use the less secure option of SQL Server and Windows Authentication mode. Restart the SQL services.
vCenter 5.1 Installation – VM Provisioning
1. Provision one or more VMs for the vCenter 5.1 install. In this blog series I’m assuming an all-in-one server to make things easier. You can certainly split up the services, which would be recommended in large environments.
I provisioned a Windows Server VM with 2 HDs, and all of the latest Windows updates. 8GB of RAM for an all-in-one server is recommended, otherwise vCenter and SSO will run veryslowly. The 5.1 release has high memory utilization.
2. Create a domain-based service account which the vCenter services will use. Add that account to the local Administrator’s group on what will become the vCenter 5.1 server.
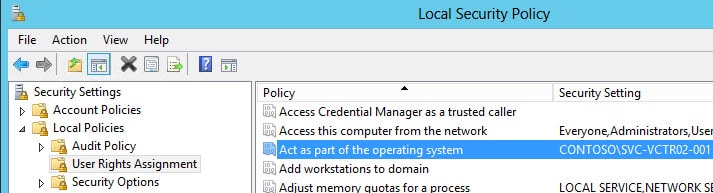
You need to ensure the service account also has the “Act as part of the operating system” user right on the vCenter server. If the Administrators group has the right then you are covered. If not, explicitly add the service account to the user right as shown below.
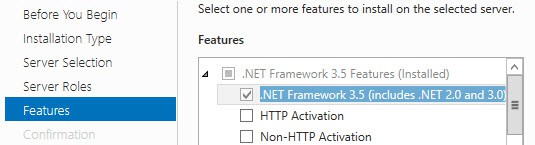
3. Open the Server Manager and add the .NET Framework 3.5 feature and wait for the install to complete.
Windows Server 2008 R2:
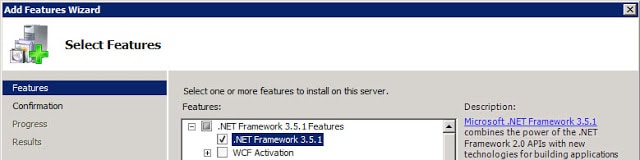
Windows Server 2012:
Do NOT install Java on the VM, as it can conflict with VMware version of Java.
Configure SQL Database
The vCenter Update 1 SSO install the wizard has been modified to support dynamic ports for SQL server instances.
Remember, VMware still does not officially support clustered SQL servers. They will provide best effort services if you run into issues, but it’s not a validated configuration.
The SSO service requires a database, as do other vCenter services. In this example we are using SQL Server 2012, but 2008 R2 SP2 is perfectly fine as well.
Prior to Update 1 SQL Server 2012 was NOT supported, so don’t try it unless you are on vSphere 5.1 Update 1. There are some hard coded restrictions in the SSO service which limit your ability to use customized names for all of the fields. In particular the DB name must only include letters, numbers, underscore (_), the at symbol (@) and the hash (#). No periods and no spaces. As of the 5.1.0b release, hyphens are now allowed though.
As a reader has pointed out, you should be using SQL Server 2008 R2 SP1 and CU6 or later (Build 10.50.2811), which addresses a JDBC issue. You can read the MS KB here. I used SQL Server 2012 in my test environment, since that’s now supported as of vSphere 5.1 Update 1.
Be sure to set passwords on the SQL accounts that meet Windows GPO password complexity and minimum length requirements.
SQL DB Configuration Steps
1. VMware database script are included in the installation ISO. In my case I called the database “D001_VMware_SSO”. Run these scripts in SQL Server Management Studio, modified to your liking.
Note: that you CAN NOT change “RSA_DATA” or “RSA_INDEX” as the SSO service is hard coded to use them and the install WILL fail if they are not present.
Note: The VMware script has auto_shrink enabled, which DBAs tell me is a bad idea.
SSO Installation
1. Login as the newly created vCenter service account and launch the vSphere installer from the ISO image and you are presented with the following screen.
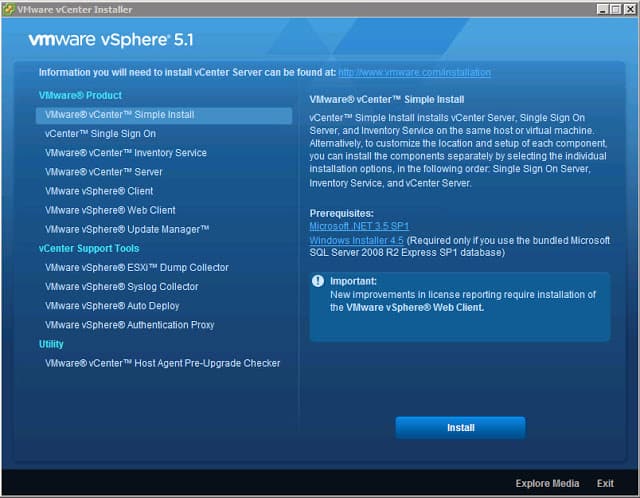
At this point VMware gives you the option of a “Simple Install” or install each component separately. We want to deliberately install each service and perform configuration steps along the way.
2. Click on vCenter Single Sign On, then click on Install. Select the appropriate language and wait for the wizard to open. After clicking through the licensing agreements and carefully reading all of the patents, you are presented with a screen with several options.
VMware gives you the option to install multiple instances of the SSO service for high availability. So on the screen below you have the option of creating a new primary node instance, or join an existing SSO instance. Since this is a new deployment, we want to create a primary node.
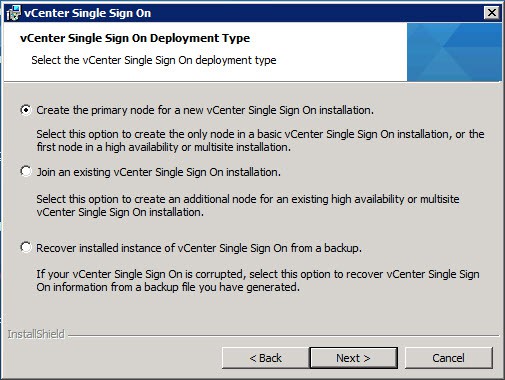
Even if you don’t want multiple SSO instances now, you may want them in the future. You don’t need to configure additional ones from the outset, so there’s no harm in leaving the door open for future expansion. Thus I selected the second option, as shown below. .

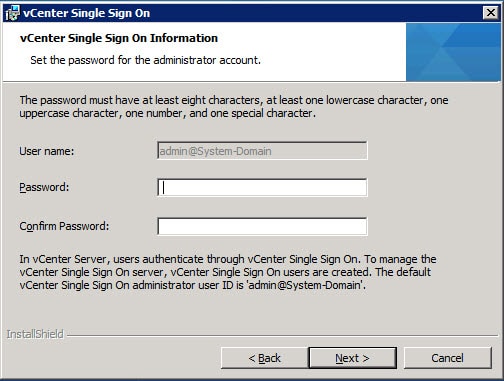
3. Next the installer will prompt you for the password to the default SSO Administrator account. Yes, this is a local account not tied to AD or the Windows host. After SSO is installed, you can configure it for one or more LDAP/AD server and other identity sources, so don’t fret too much about this application password but DO remember it.
The password must have at least eight characters, at least one lowercase character, one uppercase character, one number, and one special character. Maximum password length is 32 characters. Passwords longer than 32 characters will be truncated and cause authentication problems. The password also MUST meet local OS and AD domain length and complexity requirements. Password failures can cause the following SSO installation error:
Error 32010. Failed to create database users. There can be several reasons
for this failure. For more information, see the vmMSSQLCmd.log file in the
system temporary folder.
Note: Do NOT use the following characters, or trailing spaces:
^ (circumflex)
* (asterisk)
$ (dollar)
; (semicolon)
” (double quote)
‘ (single quote)
) (right parenthesis)
< (less than)
> (greater than)
& (ampersand)
| (pipe)
\ (backslash)
These may cause a “Error 29133.Administrator login error.” further on in the installation process. VMware has a KB article regarding these special characters here.
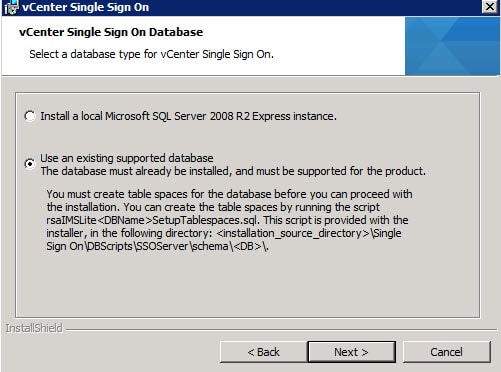
4. At this point you are presented with a dialog asking what kind of database you want to use. I would never use SQL Express in a lab or production environment, so select the second option.
5. Enter the database information in the window below, using the same details that you configured the SQL server with.
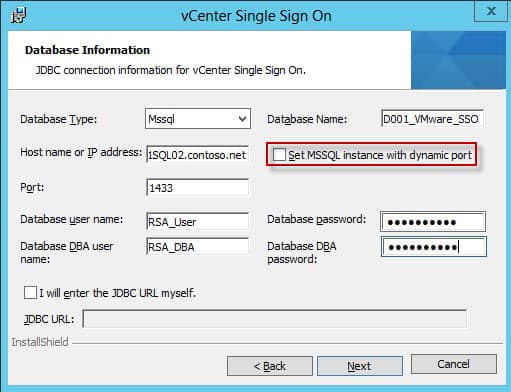
Click on Next, and if everything is validated, no errors will appear.
6. With your database details now properly configured, and maybe even using SSL to your SQL server, we can proceed with the SSO installer. If you were using a hardware load balancer, you would enter the FQDN of the VIP. Since I’m just installing one SSO instance, I’ll stick with the FQDN of the vCenter server.

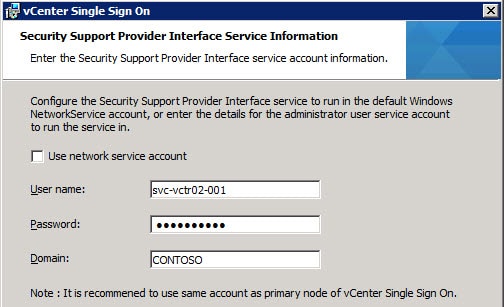
7. At this point input the vCenter service account details. Note that if you input the wrong password you will get an error “Could not find the specified user on provided domain.” which is not entirely correct. The user exists but you just fat fingered the password.
8. For the installation path I left the default, as the installer has had problems in the path with custom paths or “unusual” characters in the path.
9. On the next screen I left the HTTPS port the default, then sent the installer off on its merry way.
At this point the vCenter Single Sign On service should have successfully installed. Next up is creating all of the SSL certificates that the vCenter services require.
No comments:
Post a Comment